What You Will Need
- A battery-powered motion sensor like Wyze or Philips Hue would work well here.
- Sticky mounting strips (Command or 3M)
- Smartphone with app access
- Rubbing alcohol & microfiber cloth
- Optional non-drill corner mount or stand.
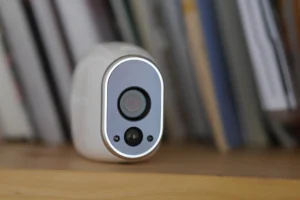
Step 1: Choose an Appropriate Motion Sensor
Select a renter-friendly model with wireless or Zigbee connectivity, battery operation, adhesive mounting capabilities and is compatible with your hub (Alexa, Google Home or SmartThings). Pro Tip: Try to avoid hardwired or ceiling-recessed models which require drilling for installation.
Step 2: Clean The Mounting Area
Apply rubbing alcohol to the wall or surface in order to clean away dust and oils, allowing it to fully dry before attaching any adhesives.
GIF Suggestion: Show cleaning movement and drying process.
Step 3: Determine Detection Range
Before permanently placing it, temporarily hold the sensor in place and walk past it to test motion range. Adjust angle or height settings (typically 6-7 feet from floor) accordingly for maximum coverage.
Step 4: Assemble Without Drilling
Make use of Command Strips or reusable adhesive pads to stick the sensor securely to any clean surface, pressing firmly for 30 seconds to adhere. For optimal grip use the adhesive at 15-35degC. Lastly GIF Suggestion: Demonstrate pressing action against wall surface.
Step 5: Integrate Your Smart App
Launch the manufacturer’s app, select Add Device, and follow on-screen instructions to connect via Bluetooth/Wi-Fi. If pairing fails:
- Hold and release button 10s before trying again
- Be within 3 – 5 feet from the hub when setting up.
GIF Suggestion: Display pairing animation or phone app interface.
Step 6: Test and Fine-Tune
Once paired, test motion detection using live view or app alerts. Adjust sensitivity or detection zones accordingly in the app to avoid false triggers from pets or curtains.
Step 7: Add Automation Features as desired (optional).
Integrate into existing routines (for instance: daily meetings).
- “If motion detected – turn on hallway light.”
- “If there’s no movement – shut off fan”
GIF Suggested for: Automating app, simple example.
Step 8: Troubleshooting Quick Table
| Issue | Likely Cause | Quick Fix |
| Sensor not detecting | Low battery | Replace batteries |
| False triggers | Facing reflective surface | Reposition sensor |
| Won’t pair | Out of range | Move closer to hub |
| Adhesive peeling | Dusty/uneven wall | Clean & reapply new strip |
Step 9: Removal (No Damage)
Moving or Repositioning: When Relocating:
- Hold sensor with one hand.
- Stretch the adhesive tab slowly in an upward and outward motion until you get to its endpoint.
- Rubbing alcohol can help remove any remaining residue.
GIF Suggestion: Show adhesive tab pull-down technique.
Assembled in 10 Minutes
Congratulations on successfully learning how to install a motion sensor without damaging walls — renter-safe, fast, and reversible installation methods have now become available!
Next Steps: Use your sensor with smart lighting solutions like smart bulbs or plugs to automate your lighting setup!